

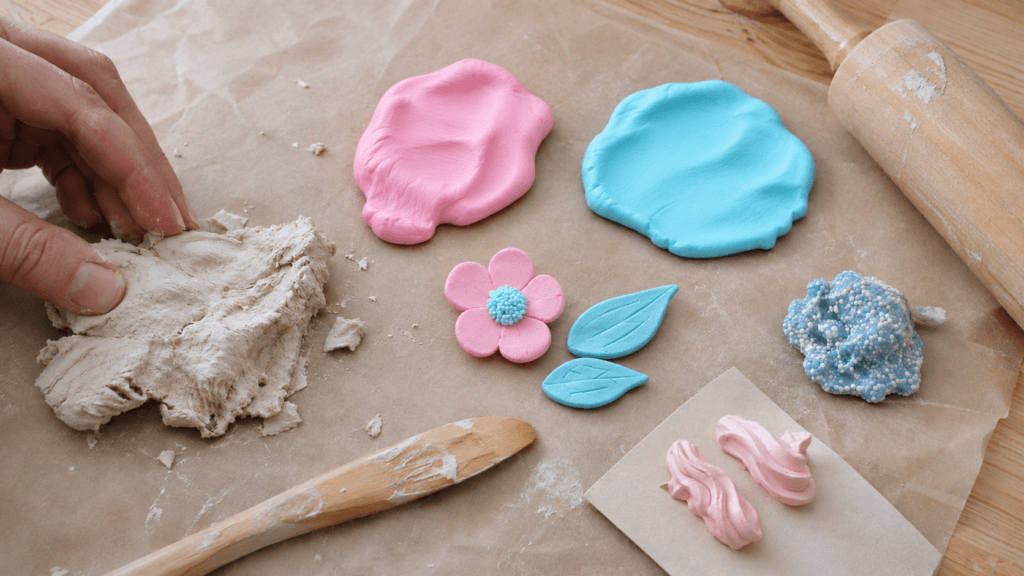
Types of Clay and Modeling Materials: How to Choose the Right One
A miniature flower, a colorful character, and a textured decoration may all begin with modeling material, but each project calls for different qualities. The right choice depends on the shapes you want to make, the finish you prefer, and how you want the material to set.
Some materials harden naturally in air. Others require baking or remain soft for repeated use. Textures also vary, from smooth and lightweight to grainy or cream-like.
This guide introduces nine clay and modeling material categories available from LY HSIN, explaining their main characteristics and offering ideas for your next craft project.
1. Air Dry Clay: For Hand-Shaped Decorations
Air-dry clay hardens naturally without an oven or kiln. It can be shaped by hand or with tools to create simple figures, textured designs, and indoor decorations.
It is a practical starting point if you want to keep your finished creation without a heating stage. Before you begin, prepare a space where the piece can dry undisturbed. Follow the product instructions before painting or applying a finish.
Project idea: Make a small decorative plaque with an initial in the center and stamped patterns around the border.
2. Oil Modeling Clay: For Repeated Practice
Oil-based modeling clay remains workable instead of drying into a permanent shape. LY HSIN’s oil modeling clay is non-drying and reusable, allowing you to reshape the same material throughout different projects.
Choose this material for sculpting practice, testing proportions, or experimenting with expressions. When you want to try another design, flatten the piece and start again.
Project idea: Turn the same piece of clay into three different animals, changing the ears, body shape, and facial features each time.
3. Ultralight Clay: For Soft, Lightweight Modeling
Ultralight clay, also known as lightweight air-dry clay, has a soft, lightweight feel and hardens naturally without baking. It offers a different modeling experience from denser craft materials.
Consider it for rounded characters, simple animals, and colorful miniature scenes. Basic shapes such as balls, teardrops, and short coils can be combined into a wide range of designs.
Project idea: Build a tiny vegetable garden with smiling carrots, rounded cabbages, and small garden signs.
4. Air-Dry Porcelain Clay: For Smooth, Detailed Shapes
LY HSIN’s air-dry porcelain clay is a resin-and-starch-based modeling material with a smooth, silky texture. It dries without kiln firing and is different from traditional porcelain clay used in ceramics.
Consider it when a smooth surface and carefully shaped details are important to your design. Before making a full piece, test a small sample to see how the material handles and dries at your chosen thickness.
Project idea: Create a small floral decoration with individually shaped petals and leaves.
5. Wood Clay: For Natural-Looking Texture
Wood clay brings a rougher, wood-like texture to modeling projects. LY HSIN’s wood clay is a water-based material that offers a different surface character from smooth craft clays.
Consider it for nature-inspired decorations where texture is part of the design. You can use simple impressions and shaped edges to complement the material’s character.
Project idea: Make a woodland-themed decorative tag with a pressed leaf pattern and softly rounded edges.
6. Whipped Cream Clay: For Dessert-Inspired Decoration
Whipped cream clay is a decorative craft material made to resemble whipped cream. Its cream-like appearance makes it useful for miniature dessert designs and decorated accessories.
Choose it when your project needs cream-style accents. Despite its food-like appearance, whipped cream clay is a craft material and must not be eaten.
Project idea: Add cream-style details and miniature fruit decorations to a dessert-themed display piece.
7. Polymer Clay: For Oven-Cured Creations
LY HSIN’s polymer clay is an oven-bake modeling material. It stays soft and workable at room temperature and requires baking to harden, rather than drying naturally in air.
Consider it for beads, miniature figures, and small decorative components when you can include a separate baking stage. Always follow the instructions for the specific product, including the requirements for your project’s thickness.
Project idea: Design a coordinated set of patterned beads using two or three complementary colors.
8. Foam Clay: For Beaded Texture
LY HSIN’s foam clay contains small beads that create a visibly textured surface. It is lightweight and dries naturally without an oven or kiln.
Choose it when you want raised texture and a different surface effect from smooth clay. Its beaded appearance can become a defining feature of the design.
Project idea: Create a textured tree canopy or arrange colorful raised shapes on a decorative panel.
9. Papier-Mâché: For Paper-Based Modeling
Papier-mâché, also commonly written as paper mache, is a paper-based craft medium. LY HSIN offers pulp powder, which requires preparation according to the product instructions before modeling.
It offers another way to explore three-dimensional forms and painted decoration. As a paper-based material, it belongs alongside clay in a modeling guide, while remaining a distinct medium.
Project idea: Build a small sculptural landscape and paint it as an imaginary island, complete with hills and winding paths.
How to Choose the Right Modeling Material
Start with three questions: What surface do you want? Does the finished piece need to harden? What equipment and preparation does the material require?
For repeated reshaping, consider oil modeling clay. For soft, lightweight forms, explore ultralight clay. For cream-like decoration, look at whipped cream clay. For a beaded surface, consider foam clay.
Compare air-dry clay, air-dry porcelain clay, and wood clay according to the surface and handling qualities you prefer. Choose polymer clay when an oven-curing stage fits your process, or explore papier-mâché if you want to work with a prepared paper-based medium.
Before starting a larger project, make a small sample. Test the shapes, connections, and finish you plan to use, and follow the product’s preparation and setting instructions.